How to do French Gel Manicure. Firstly, What is a French manicure?
The word French manicure is first to introduce by American actresses a few years ago. Then set side to side with the French touch to talk about a technique of beautification of the nails with a careful, elegant and distinguished, as are the French. Now just take a look at how French Gel Manicure finishes.
The most surprising is that in France, it was called the American manicure since it is the Americans who launched this fashion.
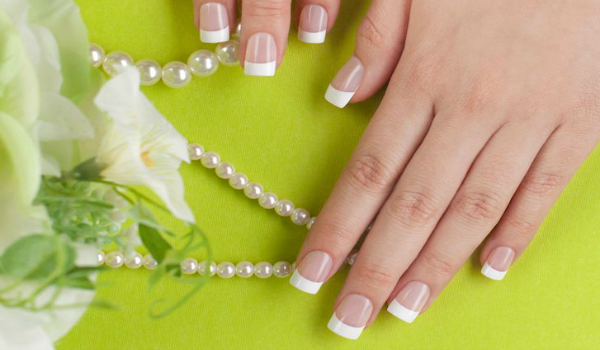
The French Gel manicure is a technique that makes beautiful nails and therefore the hand, in a simple way but with a neat and refined result.
Here are the steps of the French Gel manicure carried out in the salons by professionals:
Capsule placement on nails
If you have healthy nails, beautiful shape, long enough and not breaking easily, you will not need to have capsules. The French Gel manicure then applied directly on your nails.
For those who do not have nails as mentioned above, it is advisable to put a capsule before applying a gel or resin so that your varnish lasts longer and for a perfect rendering.
Preparation of the nail before laying
At this stage, the prosthetist will prepare the nail to receive the gel. This preparation is important for the gel to hold well and durable.
To begin, it will disinfect your hands and remove the remains of your old varnish with a non-greasy, non-scented solvent and a non-pellicles cotton to avoid leaving cotton residue on the nails, which would prevent the capsule from Adhere well to the nail.
It will then file and sand the nail to equalize it and push the cuticle so that everything is clean on the surface. Thanks to the regrowth of the cuticle, the result will be clearer at the base.
Finally, it will remove all the residue and clean the nail with a special cleaner.
How is the capsule placed?.
As said before, the capsule is not mandatory if your nails are long enough.
The beautician will choose a capsule that has exactly the width of your nails or slightly larger than it will file to be 100% of the width of your nails. Then she will lay it, not on the entire nail, but on the first third of the nail to protect the tip of the nail.
Little by little your nail will grow and will be long enough to take the place of the capsule that one can easily remove. The newly pushed nail will be perfect because protected by frost.
The capsule attaches to the nail with a special glue. Then cut to the desired length using a small instrument called “guillotine” in the profession. Then the prosthetist will apply a varnish and will sand again to equalize the set and make it natural.
Free shipping on perfumes, colognes and skin care products, just visit Best perfumes
You can choose between 4 nail and shapes:
Rounded end: this is the most appreciated because easy to maintain and does not interfere in everyday life.
Oval tip: a bit like the rounded tip but with more character.
Square tip: the easiest to achieve at home as you just have to file straight.
Sharp tip: a lot of character but can be embarrassing in everyday life.
For the French manicure, customers usually choose a square or rounded tip for a more elegant result.
The prosthetist will then file the boundary between the capsule and your nail until the line disappears. The nail then cleaned again with a cleaner. You will notice that the cleaning is done practically at each stage of the treatment of the nails.
This prevents particles from remaining on each layer and prevents the next layer from adhering to the rest. If you do business with a professional, it will do the cleaning properly which guarantees a net result and above all durable.
Gel or resin?.
It should be noted that more and more nail technicians have given up the resin and prefer the gel. Indeed, the resin gives a somewhat stiff and thick appearance to the nail. So the result is not very natural. In addition, the resin turns yellow in the light after a few weeks, which means that it has to be done again.
The way to lay the resin and the related products can also weaken the natural nail. And finally, the resin leaves an unpleasant odor that the customers do not like.

French Gel Manicure
The steps of laying the gel
This stage is the most delicate and requires a know-how on the part of professional.
The application of gel base or gel UV: the esthetician must lay a thin layer of gel respecting the curvature and general appearance of your nails for a natural, without touching the skin. Then it will cure the gel with a UV lamp that will cure the gel for 3 minutes.
The installation of camouflage gel: the esthetician will put 1 layer of camouflage gel and will pass the hand under the UV lamp to catalyze it for 3 minutes. Then it will apply a second coat and will still hold the hand under the UV lamp for 4 minutes.
The laying of construction gel: here, it will put a gel of construction in a layer much thicker than the previous ones. It will also build the crown of the nail for a natural result. Then she will pass the hand under the UV lamp to dry the whole for 4 minutes.
The gel nails will then be dry and will permanently protect your natural nails. The beautician will clean the nails with a cleaner so that they are ready to receive the varnish.
Hope you like our blog. We love to hear from you. Also, share your experience about the french manicure.
Also, visit and follow us on Facebook and Twitter.
Leave a Reply